Trochanteric Bursitis Intermediate Exercise Programme
Aim to perform this programme a minimum of once per day unless prescribed otherwise. As with any new exercise, start slowly (repetitions as able) and build up as you are able within the guidelines below.
Pain should not exceed 3/10 whilst completing this exercise programme.
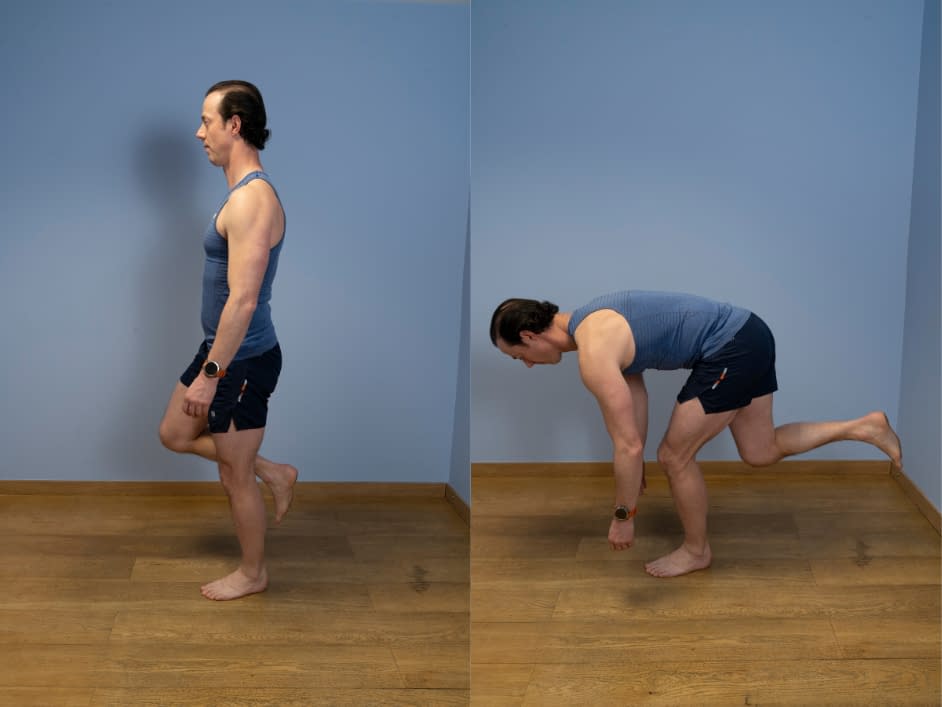
1. Single leg toe touch
- Perform this exercise standing on the affected leg and have a wall/stable object nearby to assist with balance.
- Shift your weight on to the affected leg and ‘hover’ the other leg off the floor.
- Bend forward from the hip to move towards touching your toes.
- At the same time, the trailing leg should stay straight and will travel backwards to act as a counterbalance whilst keeping your spine straight.
- As you get close to touching your toes, you should feel a pull in the hamstrings and buttock of the standing leg.
- Squeeze the buttock muscles to reverse the movement and return to standing.
- To progress, hold a small amount of weight in the opposite hand to the leading leg and gradually increase this as strength develops.
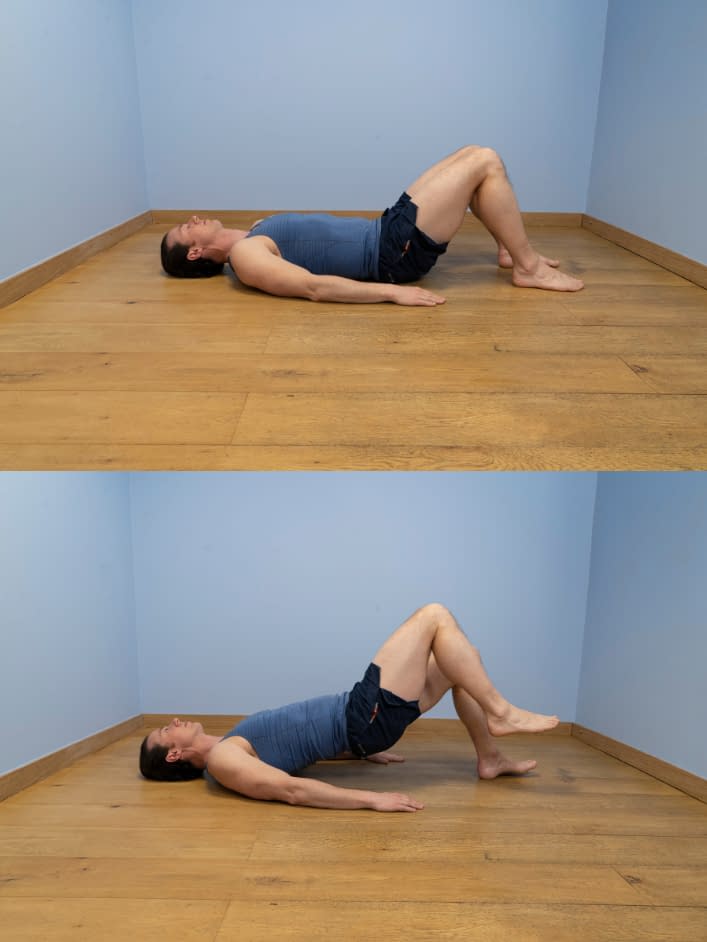
2. Bridge with leg lift
- Lie on your back on the floor or bed with your knees bent at 90 degrees, your feet on the floor, and your arms down by your side.
- Push your heels down into the floor to gently lift your hips upwards. Lift as high as you feel comfortable but no higher than a straight line between hips, knees and shoulders.
- If you feel discomfort, then try squeezing your tummy and bum muscles before starting the lift.
- From this position, lift one leg slightly off the floor and return.
- Repeat on the opposite side.
- Try and keep the pelvis still.
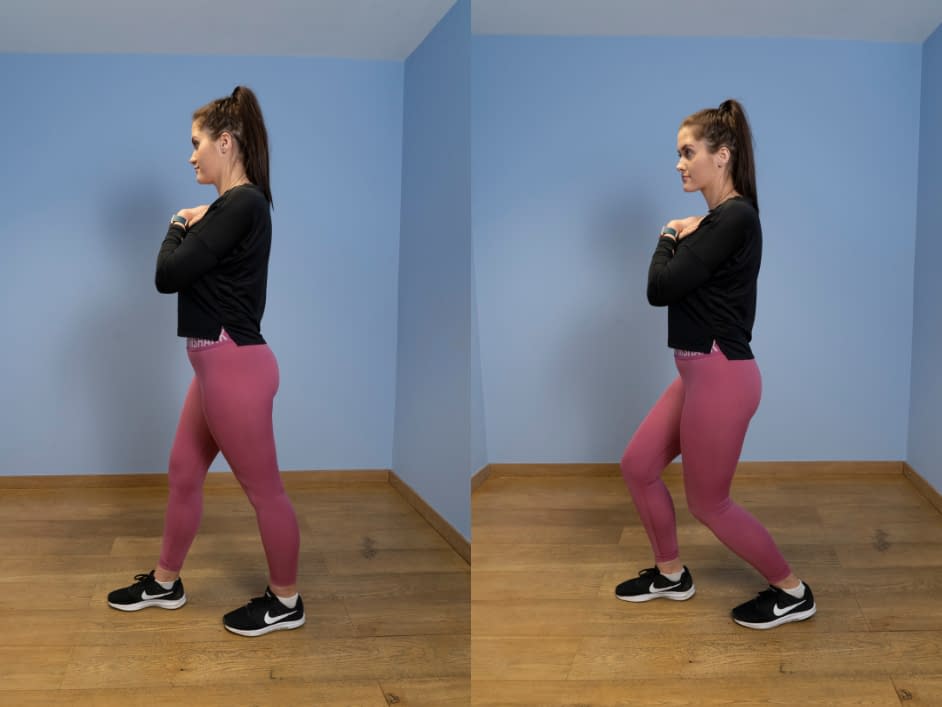
3. Split squat
- Place one foot forward and the other back to form a comfortable stride with the feet hip-width apart – you can gently hold on to something for balance
- Keep the chest up and core engaged whilst simultaneously bending both knees so that the hips lower directly downwards – emphasis should be placed on pushing up through the front foot and keeping the knee in line with the hip and ankle.
- With the trailing knee just of the floor, hold this position for a count of 3 seconds before pushing down through the feet to straighten the knees and return to the starting position.
- To progress, hold a small amount of weight in the opposite hand to the leading leg and gradually increase this as strength develops.
We recommend consulting a musculoskeletal physiotherapist to ensure exercises are best suited to your recovery. If you are carrying out an exercise regime without consulting a healthcare professional, you do so at your own risk. If you have any concerns whilst completing these exercises, please contact a healthcare professional.
More Plans
Early exercises focus on trying to improve the strength of the muscles of the outside of the hip without placing too much stress on the area. This should not exceed any more than 3/10 on your perceived pain scale.
- 0
- 1
- 2
- 3
- 4
- 5
- 6
- 7
- 8
- 910
As your hip pain reduces and you start to feel ready to return to higher-level activities, it is important to make these same exercises more dynamic and increase the demand for the exercises. This should not exceed any more than 3/10 on your perceived pain scale.
- 0
- 1
- 2
- 3
- 4
- 5
- 6
- 7
- 8
- 910